Quick Start Guide
Get up and running with Glazier in under 2 minutes.
Step 1: Download from App Store
Download Glazier from the Mac App Store:

Step 2: Install and Launch
- Install Glazier from the App Store
- Launch the app from your Applications folder or Launchpad
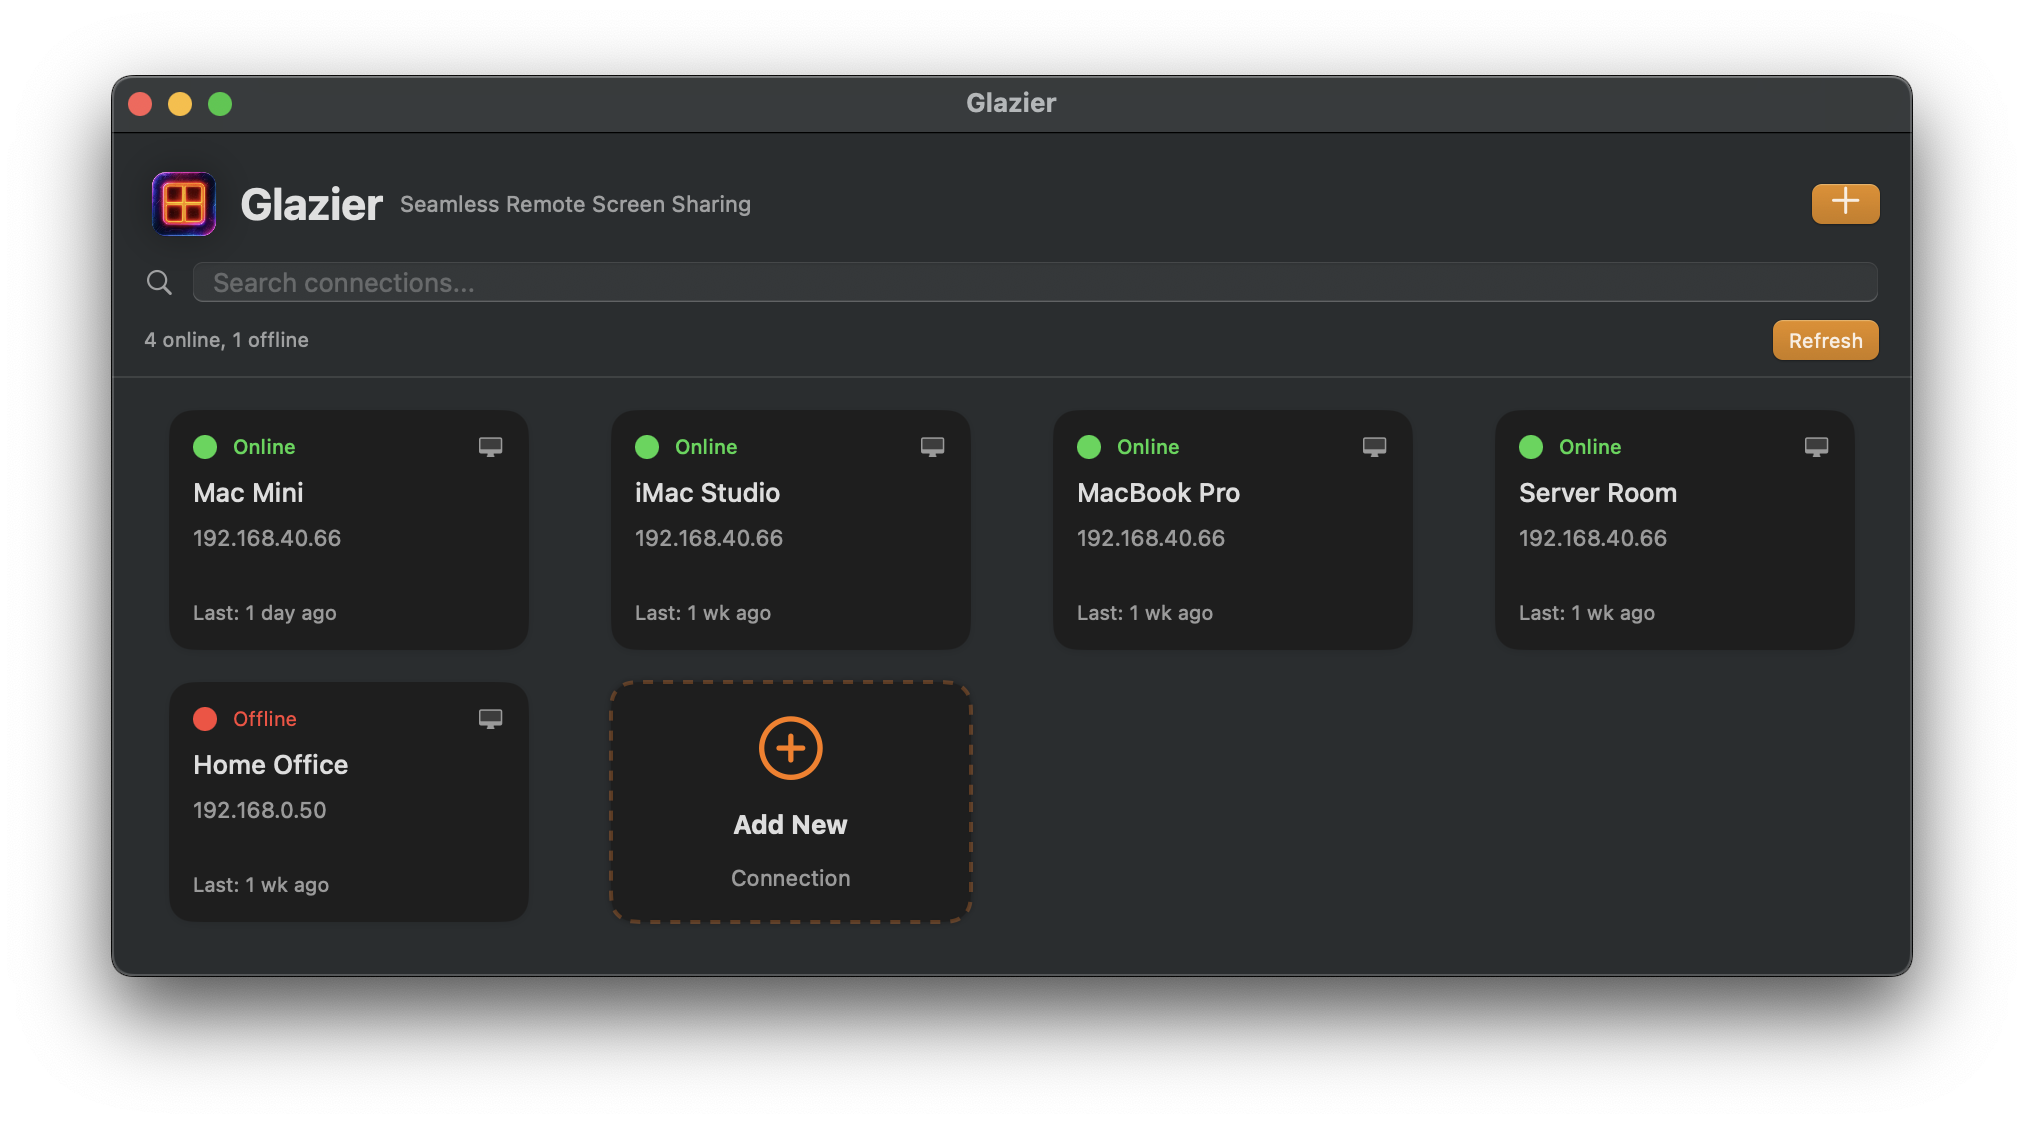
- You'll see the main Glazier interface
Step 3: Create Your First Connection
- Click the "+" button or use "Add Connection" from the menu
- Fill in your connection details:
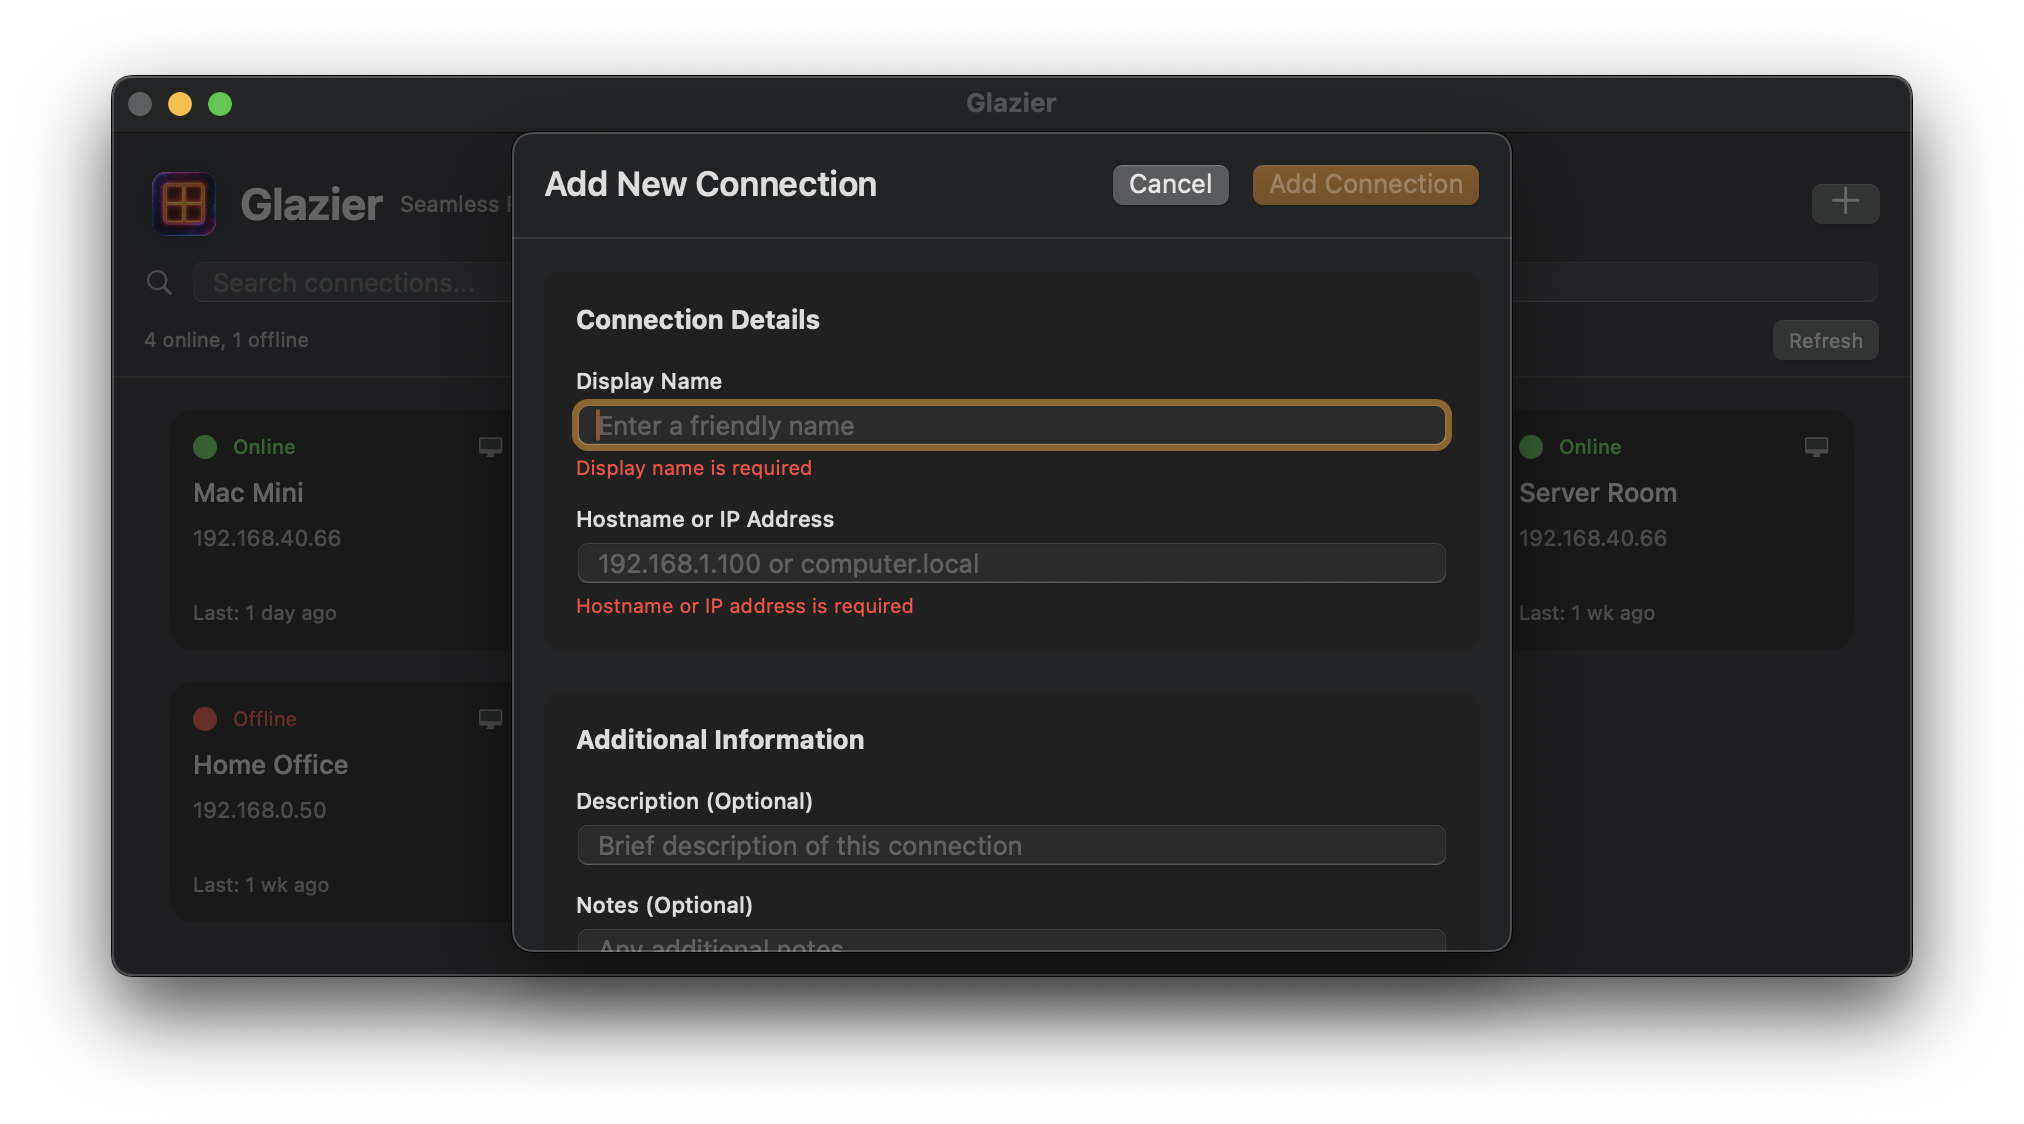
Connection Details:
- Name: Give your connection a descriptive name (e.g., "Office iMac", "Home MacBook")
- Host: Enter the IP address or hostname of the Mac you want to connect to
- Username: Your username on the remote Mac
- Password: Your password (stored securely in Keychain)
Step 4: Save Your Connection
- Review your connection details
- Click "Save" to store the connection
Your connection will now appear as a tile in the main window.
Step 5: Connect to Your Mac
- Double-click on the connection tile to start connecting
- Glazier will use macOS native screen sharing to connect
- You'll see the remote Mac's desktop and can control it as if you were sitting in front of it
Tips for Best Results
Before Connecting
- Ensure Screen Sharing is enabled on the remote Mac:
- Go to System Preferences > Sharing
- Check "Screen Sharing"
- Configure user access as needed
Connection Management
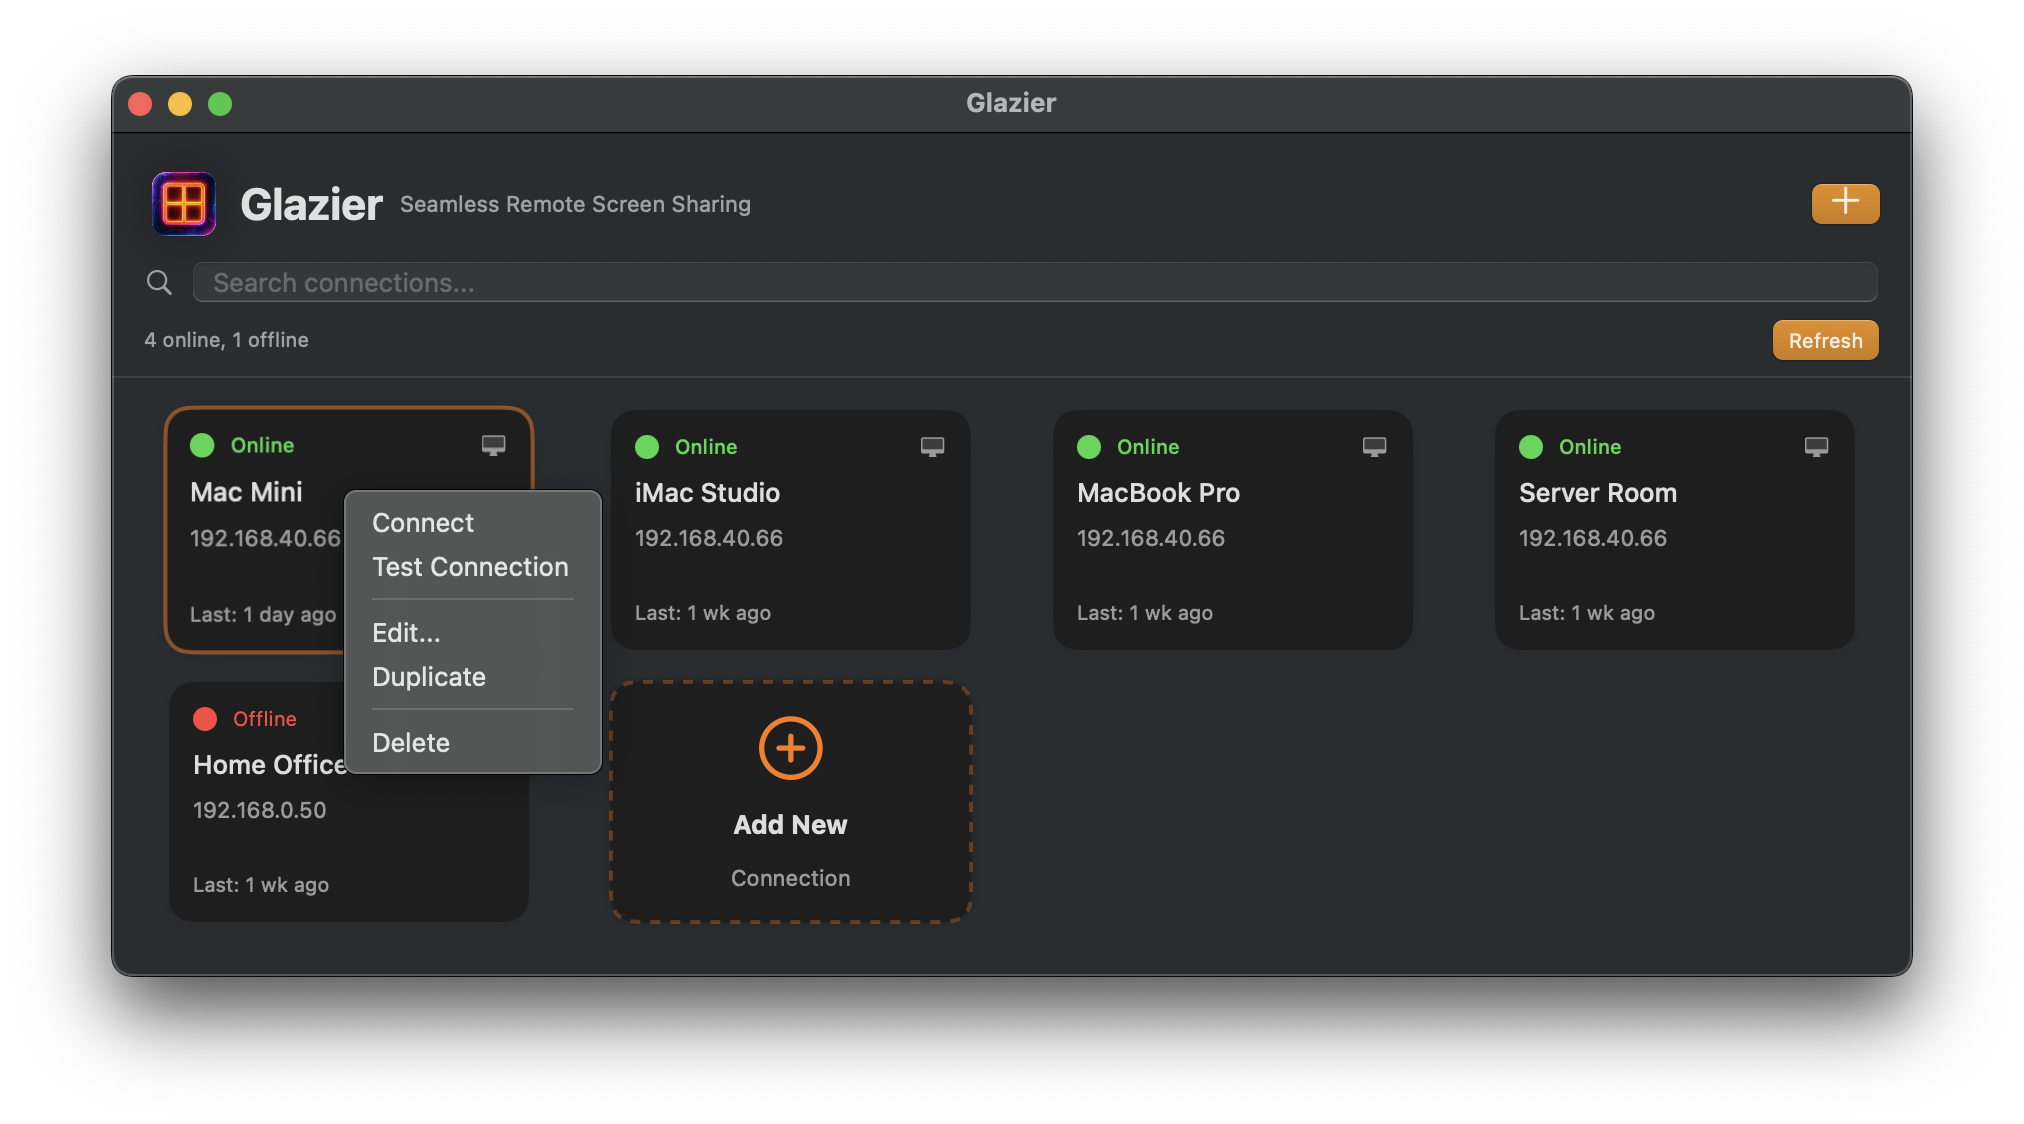
- Right-click on any connection tile for additional options
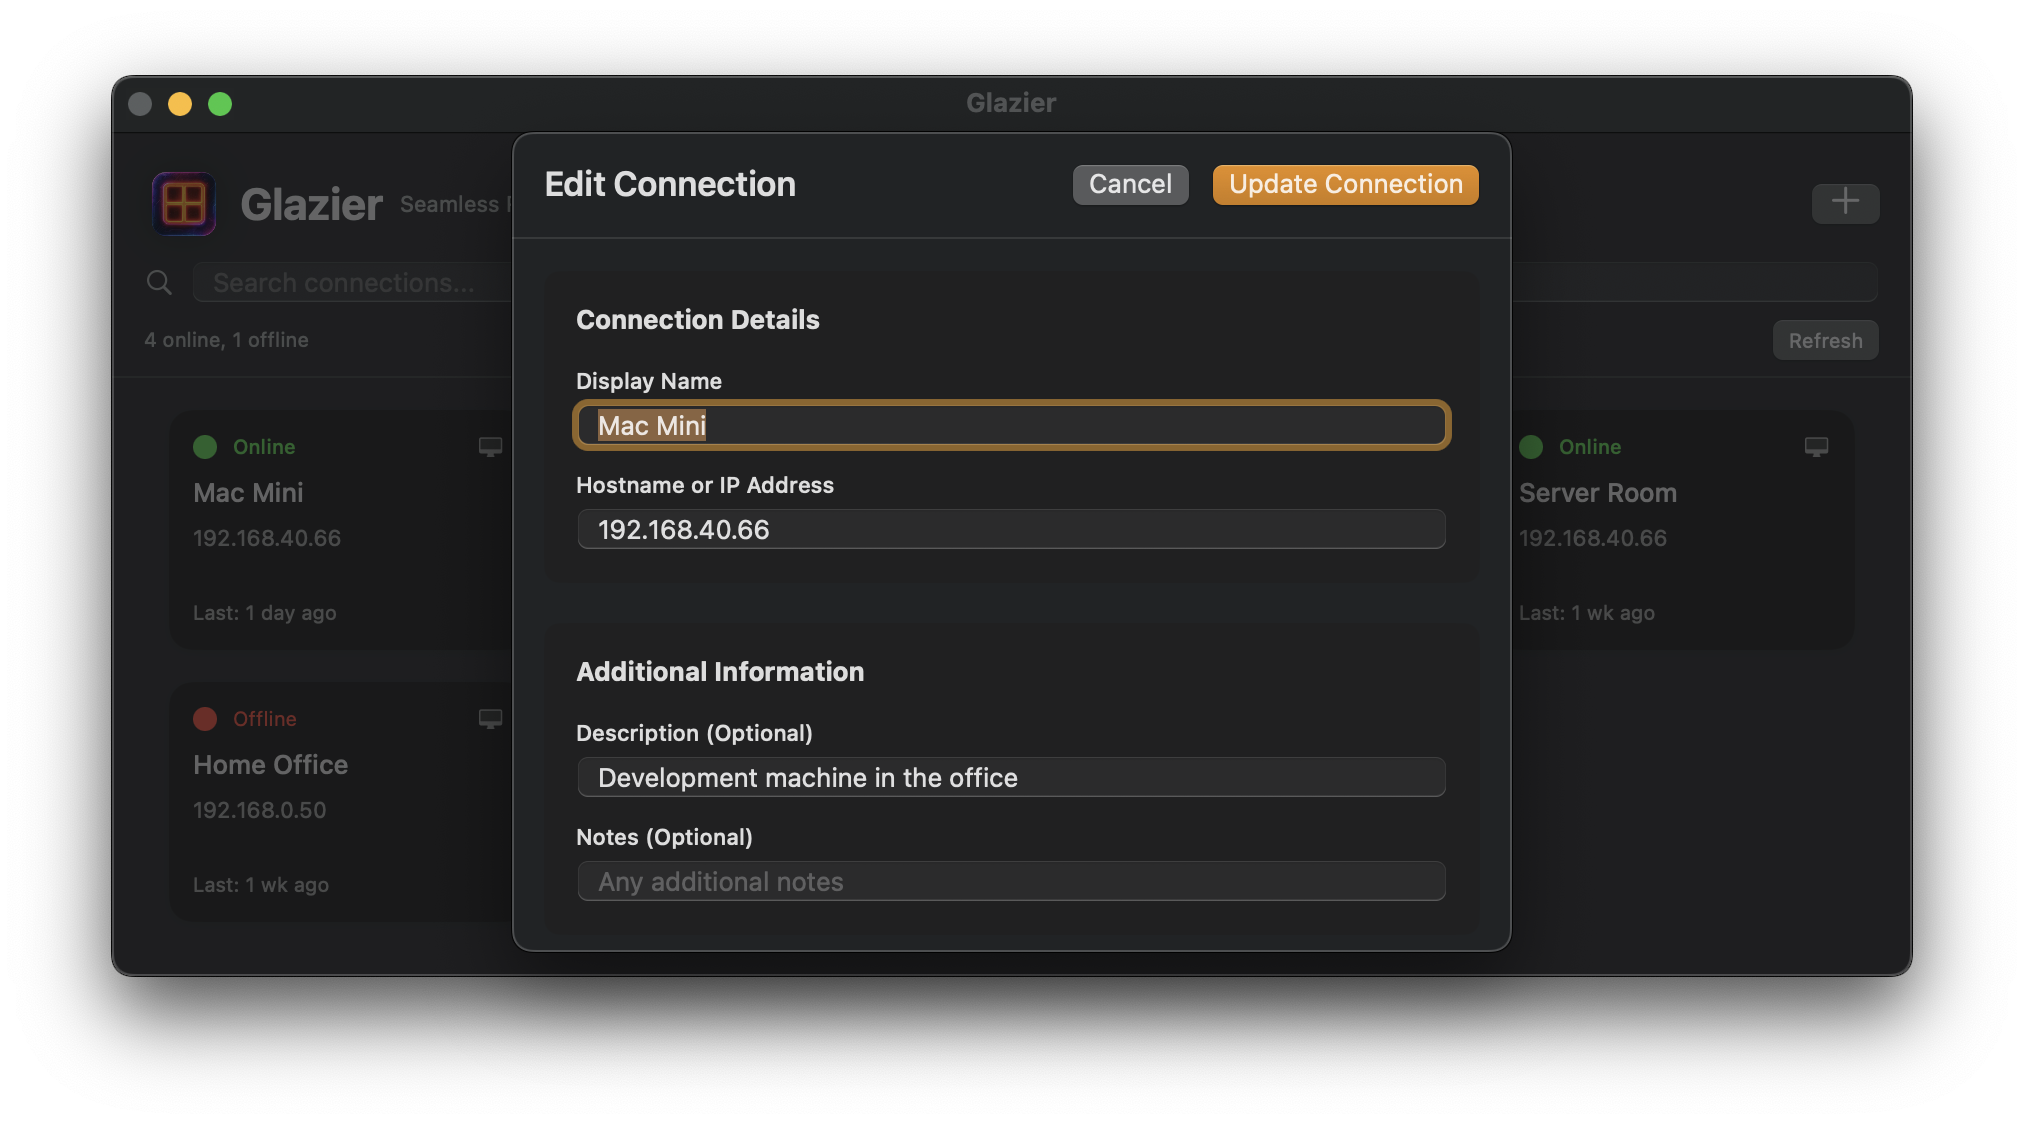
- Edit connection details anytime
- Connections sync automatically via iCloud to all your Macs
Troubleshooting
- Make sure both Macs are on the same network or accessible via internet
- Check firewall settings if connection fails
- Verify the username and password are correct
You're Ready!
That's it! You now have a simple, native way to connect to your other Macs. Glazier uses Apple's built-in screen sharing technology, so it's secure, fast, and reliable.
Need help? Check out our Features page for more detailed information about Glazier's capabilities.